What Factors Determine Attic Insulation Installation Costs?
The cost of attic insulation installation depends on five main factors: attic size, insulation material, the R-value your climate requires,…

If you have ever poked your head into an attic and noticed insulation that looks matted, discolored, or flattened, you have already spotted the warning signs. Insulation does not last forever, and when it starts to fail, the consequences ripple through your entire home. Higher energy bills, uneven temperatures, musty smells, and other indoor air quality concerns can all trace back to insulation that has outlived its usefulness. We have seen this pattern play out in home after home, and the solution is often the same: the old material needs to come out before new insulation goes in. Professional insulation removal services provide a safe and effective way to clear deteriorated materials and prepare the space for a new, properly installed insulation system.
This guide walks you through everything you need to know about insulation removal. Whether you are dealing with decades-old fiberglass that has been trampled by years of attic storage, blown-in cellulose that has absorbed moisture and turned moldy, or vermiculite insulation that might contain asbestos, we cover the full picture. You will learn why removal becomes necessary, what the process looks like from start to finish, what safety hazards are involved, how costs break down, and how to get your home ready for the project. By the end, you will have a clear understanding of what to expect and how to make the best decision for your situation.
Insulation removal is exactly what it sounds like: the process of extracting old, damaged, or contaminated insulation from a home so that new, effective insulation can take its place. Most of the time, this involves attic spaces, but wall cavities, crawl spaces, and even basements may need attention too. The work ranges from straightforward to hazardous, depending on the type of insulation present and the conditions it has been exposed to.
Why does it matter? Your insulation is the barrier between your living space and the outside world. When that barrier breaks down, heated or cooled air escapes, outdoor air seeps in, and your HVAC system works harder than it should. According to ENERGY STAR, 9 out of 10 homes in the United States are under-insulated, and sealing air leaks along with adding insulation can save homeowners an average of 15% on heating and cooling costs. But you cannot simply layer new insulation on top of the old in every case. When existing insulation is compromised, removing it first is the only way to do the job right and protect your home long-term.
Not all aging insulation needs to come out. Some homes have insulation that is thin or outdated but still functional enough to serve as a base layer for an upgrade. The problems below, though, almost always mean removal is the right call.
Take a look (or have a professional look) at the condition of the material. Fiberglass batts that have been compressed, torn, or soaked are no longer doing their job. Blown-in insulation that has settled well below its original depth has lost its R-value. Discoloration, especially dark stains on the insulation or the surrounding wood, can point to air leaks, moisture intrusion, or even smoke damage.
Rodents love attic insulation. Mice, rats, and squirrels tunnel through it, nest in it, and contaminate it with urine and droppings. According to the CDC, people should avoid contact with rodent urine, droppings, saliva, and nesting materials because of the risk of diseases like Hantavirus. Once insulation has been heavily soiled by pests, cleaning it is not practical or safe. It needs to go.
If you have had a roof leak, condensation problems, or poor ventilation in your attic, moisture can accumulate in insulation. Fiberglass and cellulose both hold water, and once they get wet, mold can grow quickly. Moldy insulation is a direct threat to indoor air quality because spores can travel through the house via the HVAC system or simple air movement. If you see mold on insulation or smell a persistent musty odor coming from above, removal is usually the safest option.
Even insulation that was not directly burned can absorb smoke particles and odors during a fire. These contaminants linger and continue off-gassing into the home. Insulation affected by fire or smoke should be removed and replaced.
If you are finishing an attic, rewiring your home, or making structural changes, existing insulation may need to come out to allow the work to proceed. This is especially common with knob-and-tube wiring, where insulation contact creates a fire hazard.
Key Takeaways
The removal process, safety requirements, and disposal methods all depend on what type of insulation is currently in your home. Here is a breakdown of the most common types.
| Insulation Type | Appearance | Common Location | Removal Method |
|---|---|---|---|
| Fiberglass Batts/Rolls | Pink, yellow, or white fluffy blankets, often backed with paper or foil | Attic floors, wall cavities, between floor joists | Hand removal, rolled and bagged |
| Blown-In Fiberglass | Loose, fluffy, pinkish-white fibers | Attic floors, wall cavities | Industrial insulation vacuum |
| Blown-In Cellulose | Gray or grayish-brown, paper-like loose fill | Attic floors, wall cavities | Industrial insulation vacuum |
| Vermiculite | Small, pebble-like granules, gray-brown or silver-gold | Attic floors, sometimes walls | Professional asbestos abatement (if contaminated) |
| Spray Foam (Open or Closed Cell) | Rigid, foam-like material adhered to surfaces | Walls, attic rafters, crawl spaces | Mechanical removal, sometimes specialized cutting |
| Mineral Wool / Rock Wool | Dense, fibrous batts, often green, brown, or gray | Walls, attics, around fire-rated areas | Hand removal, bagged |
Vermiculite deserves special attention because of its history. A mine near Libby, Montana was the source of over 70% of all vermiculite sold in the United States from 1919 to 1990, and that deposit was contaminated with asbestos. If your home has vermiculite insulation, the EPA recommends that you assume it contains asbestos and treat it accordingly. You should not disturb it, and you should not attempt to remove it yourself. Only a trained and licensed asbestos abatement professional should handle vermiculite removal.
The Minnesota Department of Health echoes this guidance, stating that intact vermiculite should be left alone, and if removal is needed, a licensed asbestos contractor should perform the work using special techniques and air monitoring to confirm safe clearance afterward.
Expert Tip: If you are unsure what type of insulation is in your attic, do not poke, pull, or vacuum any of it until a professional has identified the material. Disturbing asbestos-containing vermiculite releases dangerous fibers into the air, and the health risks are serious, including asbestosis, lung cancer, and mesothelioma.
Old insulation is not just inefficient. It can actively harm the air quality inside your home and, in some cases, pose serious health risks. Here is a closer look at the hazards.
Fiberglass insulation is made from tiny glass fibers. When the material is handled, moved, or broken apart, those fibers become airborne. The Illinois Department of Public Health notes that exposure to fiberglass can cause irritation in the eyes, nose, and throat, along with itching and skin irritation. Higher fiber levels are measured during installation and removal activities compared to when insulation is simply sitting undisturbed. While serious health effects from short-term exposure are unlikely with proper precautions, the discomfort alone is enough reason to let professionals handle removal with the right protective gear.
Rodent droppings and urine in insulation are more than a nuisance. The CDC warns that inhaling particles from contaminated rodent nesting materials can lead to Hantavirus Pulmonary Syndrome, a severe and sometimes fatal respiratory disease. Sweeping or vacuuming contaminated insulation without proper safety measures can aerosolize these particles and increase exposure risk dramatically.
Mold grows wherever moisture meets organic material. Cellulose insulation, being made from recycled paper, is especially prone to mold growth when wet. Even fiberglass, while not organic itself, can trap dust and organic debris that mold feeds on. Mold spores released from contaminated insulation circulate through your home and can trigger allergic reactions, asthma attacks, and other respiratory problems.
As we covered earlier, vermiculite insulation from the Libby mine may contain asbestos. The EPA states clearly that there is no known safe level of asbestos exposure, and fibers must be airborne to pose a health risk through inhalation. Disturbing asbestos-containing insulation without professional safeguards is one of the most dangerous things a homeowner can do during a renovation project.
When you hire a professional team for insulation removal, the work follows a structured process designed to protect both your home and the workers doing the job. Here is what happens, step by step.
Every project starts with a thorough inspection of the space. Our team evaluates the type of insulation present, its condition, the extent of any contamination (rodents, mold, water damage), and the accessibility of the area. This is when we identify potential hazards like vermiculite or knob-and-tube wiring that could affect how the work is done. We also measure the square footage and depth of the insulation to determine the scope of the project.
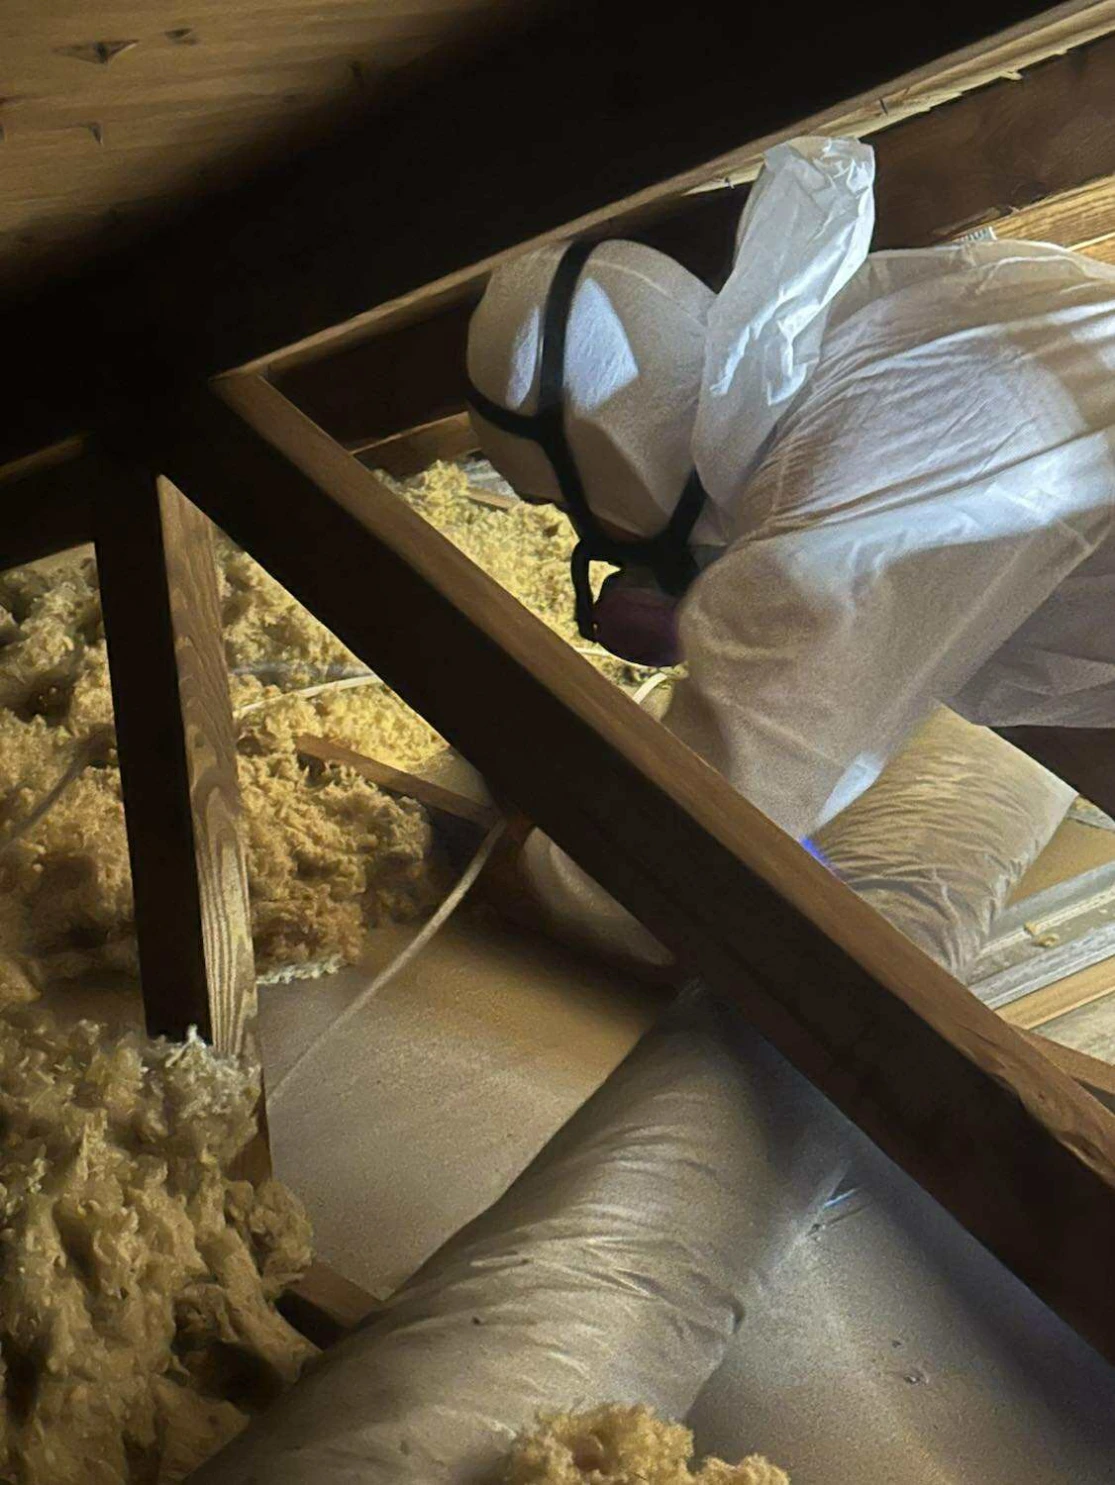
Before any material is moved, the work area is prepped. This includes laying down protective coverings over floors and any areas below the work zone, sealing off HVAC registers to prevent contamination of your duct system, and setting up ventilation or negative air pressure equipment if the situation calls for it. Workers suit up in personal protective equipment, including respirators, goggles, gloves, and disposable coveralls.
Expert Tip: If anyone in your household has respiratory issues, allergies, or a compromised immune system, let the removal team know before the project starts. Extra precautions can be taken, such as more extensive sealing of living areas or scheduling the work during a time when vulnerable family members can be away from the home.
The actual removal method depends on the type of insulation.
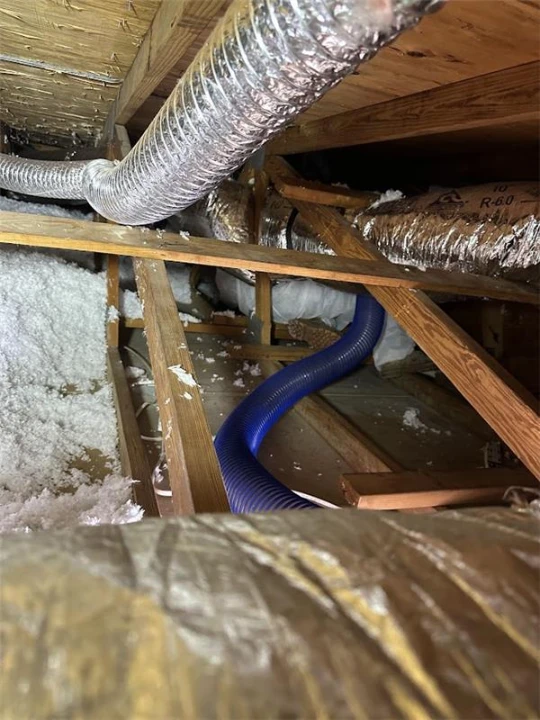
For blown-in materials like fiberglass or cellulose, a powerful industrial insulation vacuum with a long hose does the heavy lifting. The vacuum draws the loose material out through the hose and into a large disposal bag outside the home. This is fast and efficient for open attic floors.
For fiberglass batts and rolls, workers manually lift and roll the material, cut it into manageable sections if needed, and place it into heavy-duty contractor bags. This process requires care to avoid snagging on wires, pipes, or other obstacles hidden beneath the insulation.
For spray foam insulation, removal is more involved. Depending on how the foam was applied, it may need to be scraped, cut, or mechanically removed from rafters, walls, or joists. This is labor-intensive and generates significant debris.
For vermiculite insulation, the removal follows asbestos abatement protocols. Licensed professionals use controlled removal techniques, containment barriers, and specialized filtration equipment. Air monitoring is conducted throughout the process and after completion to verify that no asbestos fibers remain airborne.
Once the insulation is out, the space is not finished yet. The exposed surfaces, especially attic floors and joist bays, are cleaned of remaining dust, debris, and any traces of rodent droppings or nesting material. If pest contamination was present, sanitization treatment may be applied to eliminate bacteria and odors. This step is critical because installing fresh insulation over a dirty, contaminated space would undermine the entire project.
After cleaning, the crew does a final walkthrough of the space to confirm that all old insulation has been removed, the area is clean, and there are no remaining hazards. Any structural issues, air leaks, or ventilation problems that were uncovered during the process are noted and communicated to you, often with recommendations for addressing them before new insulation is installed.
Understanding the timeline and logistics of an insulation removal project helps you plan and avoid surprises.
Most attic insulation removal jobs for a standard home take one day. A straightforward blown-in removal on a 1,500 to 2,000 square foot attic can often be completed in 4 to 6 hours. Larger homes, difficult access, heavily contaminated material, or the presence of asbestos can extend the timeline to two or more days. Your contractor should give you a clear time estimate during the inspection phase.
Expect noise, especially if blown-in insulation is being vacuumed out. The industrial vacuums are loud. You may also hear footsteps in the attic and the movement of equipment. The good news is that most of the noise is confined to the attic and the immediate exterior area where the vacuum and disposal bags are set up. You do not need to leave your home during the process in most cases, but the noise level in upper floors may be disruptive enough that some homeowners choose to step out for a few hours.
Despite careful containment, some dust is inevitable during insulation removal. Covering furniture and belongings in rooms directly below the work area is a good idea. Your HVAC system should be turned off or set to avoid running during the removal to prevent dust from circulating through the ducts. Your removal team will handle the heavy containment work, but a little preparation on your end goes a long way.
Old insulation is not standard household waste. It must be disposed of properly, and the removal crew handles this as part of the project. Contaminated insulation, especially material that has been in contact with rodents or mold, may require special disposal at designated facilities. This is included in the scope of work and cost.
Key Takeaways
The right equipment makes the difference between a safe, clean removal and a messy, hazardous one. Here is what professional crews bring to the job.
Industrial insulation vacuum: This is the workhorse for blown-in materials. These machines generate serious suction and often include HEPA filtration to capture fine particles before they are exhausted outside. The vacuum hose extends from the attic to a disposal bag or trailer on the ground, so the material never passes through your living space.
Contractor bags: Heavy-duty plastic bags rated for construction debris are used for hand-removed materials like fiberglass batts. Standard trash bags tear under the weight and sharp edges of insulation.
Personal protective equipment (PPE): Respirators with appropriate cartridges (P100 or powered air-purifying respirators for hazardous materials), safety goggles, disposable coveralls, gloves, and boot covers are standard for every job. The level of protection increases for jobs involving mold, rodent contamination, or asbestos.
Containment materials: Polyethylene sheeting, zip walls, and HVAC covers create barriers between the work area and the rest of your home.
Hand tools: Utility knives, scrapers, and sometimes oscillating tools are used for cutting and removing batt insulation, staples, and spray foam.
Cleaning equipment: HEPA-filtered shop vacuums, brooms, and sanitizing sprays are used during the cleanup phase.
Expert Tip: If you are considering a DIY approach to insulation removal, keep in mind that a proper insulation vacuum alone costs more to rent or buy than a small project would otherwise save. Factor in PPE, disposal fees, and the time involved, and professional removal often makes more financial sense for anything beyond a very small, straightforward job.
The cost of insulation removal depends on several variables, and understanding them helps you evaluate quotes and plan your budget. Based on our pricing data, here is a breakdown of what to expect for insulation removal and replacement projects.
| Pricing Factor | What It Means for Your Project |
|---|---|
| Square footage of the space | Larger areas require more labor, time, and disposal capacity |
| Type of insulation | Blown-in is faster to remove; batts take more manual labor; spray foam is the most labor-intensive |
| Level of contamination | Rodent droppings, mold, or asbestos add safety requirements, specialized equipment, and disposal costs |
| Accessibility | Tight attic entrances, low-clearance crawl spaces, or attics with many obstacles slow down the work |
| Disposal requirements | Contaminated materials may require special landfill fees |
| Location | Local labor rates and disposal facility costs vary by area |
Expert Tip: When comparing quotes from different providers, make sure you are comparing the same scope of work. One quote might cover only removal while another includes removal plus sanitization, air sealing, and new insulation installation. Ask for a detailed breakdown so you know exactly what is included.
A little preparation on your end helps the project go smoothly and protects your belongings.
Clear the area below the work zone. Move furniture, stored items, and anything valuable away from the attic hatch or the ceiling area directly below the work space. Even with containment measures, some dust or debris can settle nearby.
Cover your HVAC registers. Your removal crew will handle this as part of their setup, but if you want an extra layer of protection, you can cover supply and return vents in rooms near the work area with plastic sheeting or even old towels before the crew arrives.
Plan for parking and access. The crew will need space to park near your home for the vacuum equipment and disposal bags. Clear your driveway or the area closest to the attic access point.
Take photos of your attic beforehand. If there is pre-existing damage to wiring, ductwork, or the attic structure, having photos before the project begins helps document the condition of the space.
Discuss any concerns upfront. If you know your home has vermiculite, knob-and-tube wiring, or a history of roof leaks, tell the crew during the initial inspection. Surprises mid-project slow things down and can add cost.
Once the old insulation is gone and the space is clean, you have a blank slate. This is actually an opportunity, because now you can address issues that were hidden or inaccessible before.
Before any new insulation goes in, air sealing is the single most effective step you can take to improve your home’s energy efficiency. Sealing gaps around recessed lights, plumbing stacks, electrical penetrations, and the attic hatch prevents conditioned air from escaping and unconditioned air from entering. ENERGY STAR notes that EPA estimates homeowners can save an average of 15% on heating and cooling costs by air sealing their homes and adding insulation in attics, crawl spaces, and basements. Air sealing is much easier and more thorough when the attic floor is exposed after insulation removal.
With a clean, sealed space, new insulation goes in and performs the way it was designed to. Depending on your climate zone, the recommended R-value for attics typically ranges from R-30 to R-60. Your insulation professional can recommend the best type and depth for your specific home and location. Common choices include blown-in fiberglass or cellulose for attics, and batt or spray foam for walls and crawl spaces.
While the insulation is out, it is a good time to verify that your attic ventilation is adequate. Proper ventilation prevents moisture buildup, reduces the risk of ice dams in cold climates, and extends the life of your roof decking and shingles. If your home has soffit vents, ridge vents, or gable vents, make sure they are clear and unobstructed before new insulation is installed.
Insulation removal is one of those projects that is easy to put off. The attic is out of sight, and the problems it causes, like high energy bills or uneven temperatures, can feel like things you just live with. But once the old material is out and fresh insulation goes in over a properly sealed space, the difference is immediate. Your home feels more comfortable, your HVAC system runs less, and the air you breathe is cleaner.
If you have noticed any of the warning signs we covered here, whether that is visible damage, pest activity, musty odors, or insulation that has simply been in place for decades without evaluation, the next step is to get a professional inspection. A trained eye can assess the condition of your insulation, identify any hazards, and give you a clear picture of what needs to happen. From there, the decision is straightforward.
Use this guide as your reference as you move forward. Every home is different, and the right approach depends on your specific situation, but the fundamentals are the same: understand what you have, address safety concerns first, remove what needs to go, and set the stage for new insulation to do its job properly.
If you are ready to take the next step with your insulation project, our team at All In OverHall is here to help. We provide professional insulation removal, replacement, and installation services and can walk you through the process from inspection to completion. Reach out to us at [email protected] or call (561) 406-3835 to schedule a consultation and get a clear, honest assessment of your home’s insulation needs.
You can handle small, non-hazardous insulation removal jobs if you have the right PPE, including an N95 respirator, goggles, gloves, and coveralls. However, if the insulation is contaminated with rodent waste, mold, or suspected asbestos, DIY removal is not safe and should be left to professionals with the proper equipment and training.
If your home was built before 1990 and has vermiculite insulation (small, pebble-like granules), the EPA recommends assuming it contains asbestos. Testing is possible but can be unreliable depending on the method used, and the EPA advises against disturbing the material in any way. If removal is necessary, hire a licensed asbestos abatement contractor.
Removal alone does not reduce energy bills. The savings come after new insulation is properly installed over a clean, air-sealed space. Once the new insulation is in place, you should notice more even temperatures and lower HVAC usage within the first billing cycle or two.
There is no strict expiration date for insulation, but most materials perform well for 30 to 50 years under normal conditions. Insulation should be evaluated if you notice rising energy bills, uneven temperatures between rooms, drafts, or visible damage from pests, moisture, or physical compression.
Yes, it can be. Professional crews use containment measures like poly sheeting and HVAC covers to minimize the mess, but some dust and debris are unavoidable. Preparing your home by covering nearby furniture and belongings helps. The crew cleans the work area thoroughly before leaving.
In some cases, yes. If the existing insulation is dry, clean, undamaged, and still has decent coverage and depth, new blown-in insulation can be added on top. But if the old material is contaminated, wet, moldy, compressed, or a potential asbestos hazard, it must be removed first. Adding new insulation over compromised material traps problems in place.