
How Insulation Replacement Solves High Energy Bills and Comfort Issues in Sewall’s Point, FL?
Replacing degraded or insufficient insulation is one of the most effective ways to cut energy costs and restore indoor comfort…

If you have ever stepped inside a pole barn in January and felt the cold radiating off every metal surface, you already understand why insulation matters. Pole barns and post-frame structures are incredibly versatile, serving as workshops, horse arenas, storage facilities, and even full-time residences. But their wide-open interiors, exposed metal panels, and post-and-beam construction make them notoriously difficult to keep comfortable. Without proper insulation, a pole barn is essentially a giant metal thermos that works in reverse, letting heat pour out in winter and bake you in summer.
This guide draws on years of hands-on experience insulating post-frame buildings of every size and use. We have insulated everything from small backyard workshops to large commercial facilities, and we have learned that the difference between a miserable pole barn and a genuinely comfortable one comes down to a handful of decisions made during the insulation process. Decisions about material selection, moisture management, air sealing, and R-value targets. A detailed pole barn insulation guide can help property owners make those decisions with confidence.
Before we talk about solutions, it helps to understand the problem. A pole barn loses and gains heat through three mechanisms: conduction, convection, and radiation. According to the U.S. Department of Energy’s Energy Saver program, conduction moves heat through solid materials, convection circulates heat through air, and radiation travels in a straight line and heats anything solid in its path. In a pole barn, all three mechanisms are working against you simultaneously.
Metal roofing and siding are excellent conductors. On a hot summer day, a metal roof absorbs solar radiation and conducts that heat directly into the building. In winter, any warmth generated inside transfers through the metal skin to the cold outdoors. The wood framing in a post-frame building creates thermal bridging, which means heat bypasses the insulation at every point where wood or metal contacts both the interior and exterior.
Unlike a traditional house with 2×4 or 2×6 studs spaced 16 or 24 inches apart, pole barns use large posts set several feet apart with girts spanning between them. These wide bays can actually be an advantage for insulation because there are fewer framing members to create thermal bridges. But the trade-off is that pole barns often lack the continuous sheathing layer, house wrap, and interior drywall that a conventional home uses as part of its building envelope. That means the insulation material itself has to do more of the heavy lifting.
R-value measures an insulation material’s resistance to conductive heat flow. The higher the R-value, the better the thermal performance. As described by the U.S. Department of Energy, R-value depends on the type of insulation, its thickness, and its density. When you add multiple layers of insulation, you simply add the R-values together.
But there is an important distinction between the R-value printed on a product label and the actual, effective R-value once it is installed in a building. Compressed insulation performs worse than its rated value. Insulation with gaps, voids, or settling loses effectiveness. And thermal bridging through framing members reduces the overall assembly R-value below what the insulation alone can achieve.
For pole barns, this means you need to think about the system R-value, not just the material R-value. A high-quality fiberglass batt that has been smashed into a tight cavity will underperform. Spray foam that fills every crack and crevice will often outperform a thicker layer of batt insulation simply because it eliminates air gaps.
Key Takeaways
Choosing the right insulation material is the most consequential decision you will make. Each option has distinct strengths and weaknesses, and the best choice depends on your climate, budget, building use, and tolerance for moisture risk. Here is a breakdown of the most common materials used in pole barn insulation.
Fiberglass is the most widely used insulation material in the country. It comes in pre-cut batts or continuous rolls designed to fit between standard framing members. In a pole barn, fiberglass is typically installed in the wall cavities between girts and in ceiling cavities between trusses or rafters.
The Department of Energy’s Insulation Materials guide notes that fiberglass batts for a 2×4 wall cavity deliver R-11 to R-15, while high-density batts for a 2×6 cavity can reach R-21. Fiberglass is relatively affordable, easy to source, and familiar to most builders.
Pros:
Cons:
Expert Tip: When using fiberglass in pole barn walls, make sure the batt width matches the cavity depth. Pole barn girts are often set at different spacings than standard stud walls, so standard 16-inch or 24-inch batts may not fit without trimming or compression. Compressed fiberglass loses a significant portion of its rated R-value.
Closed-cell spray foam is applied as a liquid that expands and hardens into a dense, solid cellular material. It delivers roughly R-6 to R-7 per inch, making it one of the highest-performing insulation materials available at a practical thickness. For a typical 2-inch application, you get R-12 to R-14. Going to 3 inches brings you to R-18 to R-21.
Spray foam expands to fill every gap, crack, and irregular space in the building cavity. According to the Department of Energy’s Types of Insulation guide, foam-in-place insulation yields higher R-values than traditional batt insulation for the same thickness and fills even the smallest cavities, creating an effective air barrier.
Pros:
Cons:
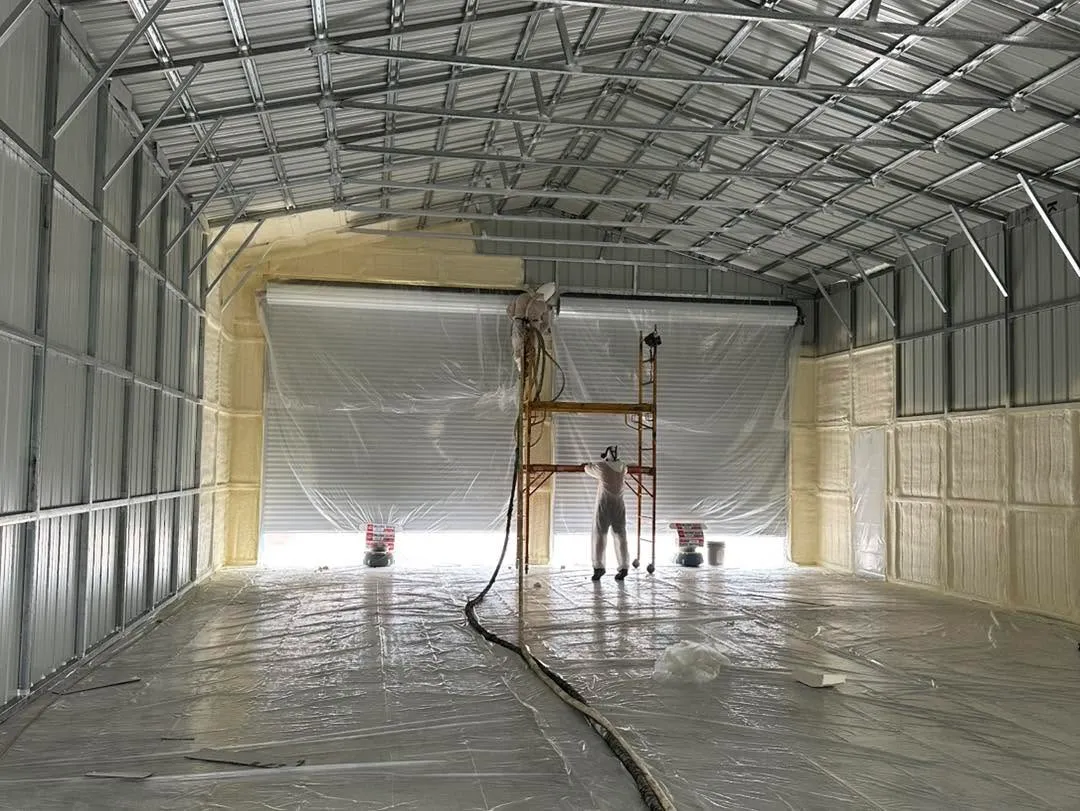
Expert Tip: For pole barn roofs, even a thin layer of closed-cell spray foam applied directly to the underside of the metal roofing creates a thermal break that prevents condensation. This is often the single most effective upgrade you can make to an existing pole barn.
Open-cell spray foam is a lighter, less dense alternative to closed-cell foam. It has a spongy texture because the cells are filled with air rather than gas. It delivers roughly R-3.5 to R-3.8 per inch, so it requires about twice the thickness to match the performance of closed-cell foam.
Open-cell foam is vapor-permeable, meaning water vapor can pass through it. This is actually an advantage in certain wall assemblies where you want the wall cavity to dry to one direction. It also fills gaps and seals air leaks effectively.
Pros:
Cons:
Rigid foam boards come in several types, including expanded polystyrene (EPS), extruded polystyrene (XPS), and polyisocyanurate (polyiso). These panels provide high R-value per inch and can be installed as continuous insulation on walls and ceilings.
Polyiso typically delivers the highest R-value at around R-5.6 to R-6.5 per inch. EPS offers R-3.8 to R-4.4 per inch and is the most affordable option. XPS falls in between at R-5 per inch. The Department of Energy notes that rigid foam boards can block thermal short circuits when installed continuously over framing members, which makes them especially useful in pole barns where thermal bridging through girts is a real concern.
Pros:
Cons:
Reflective insulation systems use foil-faced materials to reflect radiant heat away from the living space. They are most effective in hot climates where reducing cooling loads is the primary goal. The Department of Energy reports that radiant barriers can lower cooling costs 5% to 10% in warm, sunny climates. They have no inherent R-value and must face an air space to function properly.
In pole barns, reflective insulation is sometimes draped over purlins before the metal roofing is installed, creating a radiant barrier that reduces heat gain through the roof. Some products combine a reflective layer with a thin layer of fiberglass or foam for both radiant and conductive resistance.
Pros:
Cons:
| Material | R-Value per Inch | Air Sealing | Vapor Barrier | Best For |
|---|---|---|---|---|
| Fiberglass batts | 2.9 – 3.8 | Poor | No (separate barrier needed) | Budget projects, DIY installation |
| Closed-cell spray foam | 6.0 – 7.0 | Excellent | Yes | Maximum performance, moisture control |
| Open-cell spray foam | 3.5 – 3.8 | Excellent | No (vapor permeable) | Sound-dampening, filling irregular cavities |
| Rigid foam board | 3.8 – 6.5 | Moderate | Depends on the type and facing | Continuous insulation, thermal bridging |
| Reflective/radiant | N/A | None | No | Hot climates, reducing cooling loads |
The right R-value for your pole barn depends on your climate zone, what part of the building you are insulating, and how the building is used. The ENERGY STAR recommended R-value table, based on the 2021 International Energy Conservation Code, provides clear guidance for residential structures. While pole barns are not always residential, these targets serve as an excellent benchmark for conditioned pole barn spaces.
| Climate Zone | Attic / Roof | Walls | Floor |
|---|---|---|---|
| 1 (Hot, humid) | R-30 to R-49 | R-13 | R-13 |
| 2 (Warm) | R-49 to R-60 | R-13 | R-13 |
| 3 (Warm, mixed) | R-49 to R-60 | R-20 or R-13 + R-5 continuous | R-19 |
| 4 (Mixed, cold) | R-60 | R-20 + R-5 continuous or R-13 + R-10 continuous | R-19 to R-30 |
| 5 (Cold) | R-60 | R-20 + R-5 continuous or R-13 + R-10 continuous | R-30 |
| 6 (Very cold) | R-60 | R-20 + R-5 continuous or R-13 + R-20 continuous | R-30 |
| 7 and 8 (Subarctic, arctic) | R-60 | R-20 + R-5 continuous or R-13 + R-20 continuous | R-38 |
These numbers represent the recommended R-values for wood-framed buildings. For pole barns, reaching these targets is certainly achievable, but you may need to combine insulation types to get there efficiently. For example, in Climate Zone 3, reaching R-49 in the roof cavity with fiberglass alone would require roughly 14 inches of insulation. That same R-49 target can be achieved with about 7 to 8 inches of closed-cell spray foam, though that is rarely practical from a cost standpoint.
Expert Tip: If your pole barn is used for occasional storage and you only need to keep it above freezing in winter, you do not necessarily need to hit these full residential targets. Aim for the walls and focus your investment on the ceiling or roof, which is where most heat loss occurs. If the building is conditioned full-time and used as a living space, workshop, or office, then hitting or exceeding these R-value targets is well worth the investment.
Moisture is the single most common cause of insulation failure in pole barns. More buildings have been ruined by condensation than by any other factor. Understanding why condensation forms and how to prevent it is not optional knowledge; it is essential.
Condensation forms when warm, moist air contacts a cold surface and the temperature of that surface drops below the dew point of the air. In an uninsulated pole barn, the metal roof and siding can be 20 to 40 degrees colder than the interior air on a winter day. Any moisture in the air, whether from breathing, heating systems, concrete floors, or stored materials, will condense on those cold metal surfaces.
The Department of Energy’s Moisture Control guide explains that air movement accounts for more than 98% of all water vapor movement in building cavities. Air naturally moves from high-pressure areas to lower-pressure areas through any available hole or crack. This means that even tiny air leaks in your building envelope are the primary pathways for moisture to enter wall and ceiling cavities, where it condenses on cold surfaces.
Once condensation forms inside a wall or ceiling cavity, the results are predictable and damaging. Insulation gets wet and loses thermal effectiveness. Wood framing rots. Metal fasteners corrode. Mold and mildew grow. In severe cases, water can drip from ceiling panels onto equipment, inventory, or finished surfaces below.
A vapor retarder is a material that reduces the rate at which water vapor can move through it. The Department of Energy’s Vapor Barriers guide classifies vapor retarders into three categories based on their permeability, measured in “perms”:
For most pole barn applications, the goal is to install a Class I or Class II vapor retarder on the warm side of the insulation. In heating-dominated climates, that means the interior face. In cooling-dominated climates, it means the exterior face. The vapor retarder should be continuous, with all seams sealed and all penetrations addressed.
Here is how we approach moisture control in pole barn insulation projects:

Key Takeaways
Now that we have covered the materials and the science, here is how we approach a pole barn insulation project from start to finish. The exact sequence varies depending on whether you are working with new construction or retrofitting an existing building, but the principles remain the same.
Before choosing materials, you need to understand what you are working with. Walk through the building and evaluate:
Air sealing should always happen before or at the same time as insulation installation. The Department of Energy states that reducing air leakage is a cost-effective way to cut heating and cooling costs, improve durability, increase comfort, and create a healthier indoor environment.
Focus on these critical areas:
Use spray foam sealant for larger gaps and caulk for smaller cracks. For gaps around the bottom of steel panels, foam sealant tape is particularly effective.
For the walls, your approach depends on the framing depth and your material choice:
Fiberglass approach:
Spray foam approach:
Rigid foam approach:
The roof or ceiling is where the biggest energy losses occur, so this is where you should invest the most effort and material.
For ceilings with a flat finished surface (insulated ceiling approach):
For cathedral ceilings or exposed metal roofing (insulated roof approach):
Expert Tip: In buildings with exposed metal roof panels, do not skip the roof insulation just to save money. Condensation on an uninsulated metal roof in winter can rain down on everything below, destroying tools, inventory, and equipment. Even a thin layer of closed-cell spray foam can prevent this entirely.
Slab-on-grade floors are a significant source of heat loss because the edges of the slab are exposed to outdoor temperatures. Insulating the perimeter of the slab with rigid foam board, either vertically at the edge or horizontally extending under the slab, reduces this heat loss. For existing buildings where the slab is already poured, adding rigid foam at the interior perimeter and covering it with a protective layer can help.
Over the years, we have seen the same errors repeated on project after project. Avoiding these mistakes will save you significant money and frustration.
Insulation works best when the building is reasonably airtight. Fiberglass batts alone do not stop air movement. If you have a 2×6 cavity full of R-19 fiberglass but air is flowing through gaps around the perimeter, through electrical boxes, and around framing, you are losing a substantial portion of the insulation’s effectiveness. Always air seal first, then insulate.
This mistake traps moisture inside the wall cavity and virtually guarantees condensation problems. A common scenario: foil-faced fiberglass batts (which already have a vapor retarder facing) are installed, and then someone adds a separate polyethylene sheet over the top. Now you have two vapor retarders with insulation sandwiched between them. Any moisture that gets into the cavity cannot escape in either direction.
Expert Tip: If your fiberglass batts have a kraft paper or foil facing, that facing already serves as your interior-side vapor retarder. Do not add polyethylene on top of a faced batt system. If you plan to use polyethylene, use unfaced batts.
Fiberglass gets its R-value from the air pockets trapped in the glass fibers. When you compress fiberglass into a cavity that is too narrow, you squeeze out those air pockets, and the R-value drops. A standard R-19 batt designed for a 6-inch cavity loses a meaningful portion of its thermal resistance if you try to force it into a 4-inch or 5-inch space.
Many people insulate the walls of their pole barn thoroughly but leave the roof or ceiling completely bare. Since hot air rises and the roof has the largest surface area exposed to the sun, an uninsulated roof can account for more heat loss and gain than all the walls combined. Prioritize ceiling and roof insulation, even if it means investing less in wall insulation to stay within budget.
If your pole barn already has condensation damage, mold, rotting wood, or wet insulation, adding more insulation on top of the problem will not fix it. You need to address the moisture source first. That might mean improving ventilation, fixing leaks, or removing damaged materials before proceeding with new insulation. Installing insulation in wet conditions will only accelerate the damage.
The most cost-effective pole barn insulation projects often combine two or more insulation types to maximize performance without overspending. Here are some proven hybrid strategies:
This is a common and practical approach. Apply 2 inches of closed-cell spray foam to the underside of the metal roof panels to create the thermal break and vapor barrier that prevents condensation. Then insulate the walls with fiberglass batts, poly vapor barrier, and your interior finish. This puts the highest-performance material where it matters most, the roof, while keeping the walls insulated affordably.
In this approach, a thin layer of closed-cell spray foam is applied first to the interior face of the metal siding, creating a thermal break and vapor barrier. Then open-cell spray foam fills the remainder of the cavity. The open-cell foam is less expensive per inch and still provides excellent air sealing and cavity fill. This combination delivers a high overall R-value at a lower cost than using closed-cell foam for the entire cavity.
Install rigid foam board against the interior face of the metal siding as a continuous layer, then frame a standard stud wall inside and fill it with fiberglass batts. The rigid foam provides continuous insulation that reduces thermal bridging, and the fiberglass fills the new stud cavities for additional R-value. This approach also gives you a conventional framing system to attach interior finishes to.

Insulation without ventilation is a recipe for moisture problems. Once you insulate and air seal a pole barn, the building becomes much tighter. That is great for energy efficiency, but it means you need a way for the building to breathe.
The type of ventilation you need depends on the building’s use and construction:
The Department of Energy’s moisture control guidance emphasizes that proper ventilation should be part of any comprehensive moisture management strategy. The right ventilation system protects your insulation investment and keeps the building dry and durable.
After insulation is installed, how do you verify that it is performing as expected? Here are practical ways to evaluate the results:
1. Temperature consistency. Walk through the building on a cold day. Are there cold spots near walls, doors, or the ceiling? Are some areas noticeably warmer than others? Consistent temperatures throughout the space indicate that insulation is evenly installed and air leaks have been sealed.
2. Condensation check. During cold weather, inspect metal surfaces throughout the building. Look for frost, water droplets, or damp spots. If you see condensation, either the insulation is insufficient, the vapor barrier is compromised, or air leaks are allowing warm, moist air to reach cold surfaces.
3. Energy bills. Compare your heating and cooling costs before and after insulation. A well-insulated pole barn should show a measurable reduction in energy use within the first full heating or cooling season.
4. Professional energy assessment. A blower door test measures the overall airtightness of the building and identifies remaining air leaks. Thermal imaging (infrared cameras) can reveal insulation gaps, missing insulation, and thermal bridges that are invisible to the naked eye.
Expert Tip: If you insulated your pole barn and are still uncomfortable or seeing high energy bills, do not assume the insulation itself is the problem. In our experience, the issue is almost always inadequate air sealing or moisture problems that were not addressed before insulation was added. Air sealing and moisture control are not optional extras; they are part of the insulation system.
Fiberglass and rigid foam are suitable for capable DIYers with proper safety gear, while spray foam requires professional installation. Focus on air sealing and vapor barriers to avoid performance issues.
Requirements depend on your climate and use. For conditioned spaces, follow the ENERGY STAR recommended R-values. Unconditioned buildings benefit from moderate insulation for temperature stability and condensation control.
Generally, yes. In cold climates (Zones 4-8), install a Class I vapor retarder on the interior; in hot, humid climates (Zone 1), place it on the exterior to block humidity.
Often, yes. It provides superior R-value, air sealing, and moisture protection, making it highly effective for heated spaces or areas prone to condensation.
Wet insulation loses effectiveness and causes mold, rot, and corrosion. Identify the moisture source, replace damaged insulation, and ensure the cavity is fully dry before reinstalling.
Yes, retrofitting is common. Evaluate your building’s current construction and finishes, and prioritize fixing existing air leaks and moisture sources before adding new insulation.
The right insulation approach for your pole barn depends on a combination of factors: your climate zone, your budget, how you use the building, and whether you are working with new construction or retrofitting an existing structure. But regardless of those specifics, the principles remain the same.
Start with air sealing. It is the cheapest and most effective step you can take, and it amplifies the performance of whatever insulation you choose. Address moisture control with the right vapor retarder for your climate, and never install a double vapor barrier. Invest the most in your ceiling or roof insulation, where heat loss and condensation risk are highest. And use the R-value targets for your climate zone as your benchmark.
Keep this guide handy as you plan your project. Whether you are insulating a small backyard workshop or a large commercial facility, the fundamentals covered here will help you make informed decisions and avoid costly mistakes. Every building is different, so adapt these strategies to your specific situation, and do not hesitate to seek a professional assessment if you are unsure about any aspect of the process.
If you are planning a pole barn insulation project and want professional guidance, we are here to help. ALL IN OVERHALL brings years of hands-on experience with post-frame buildings of all sizes and uses. Reach out to us at [email protected] or call (561) 406-3835 to discuss your project and get started with a plan tailored to your building.

